
A Man’s Portrait (WIP)
Character modeling, sculpting and texturing

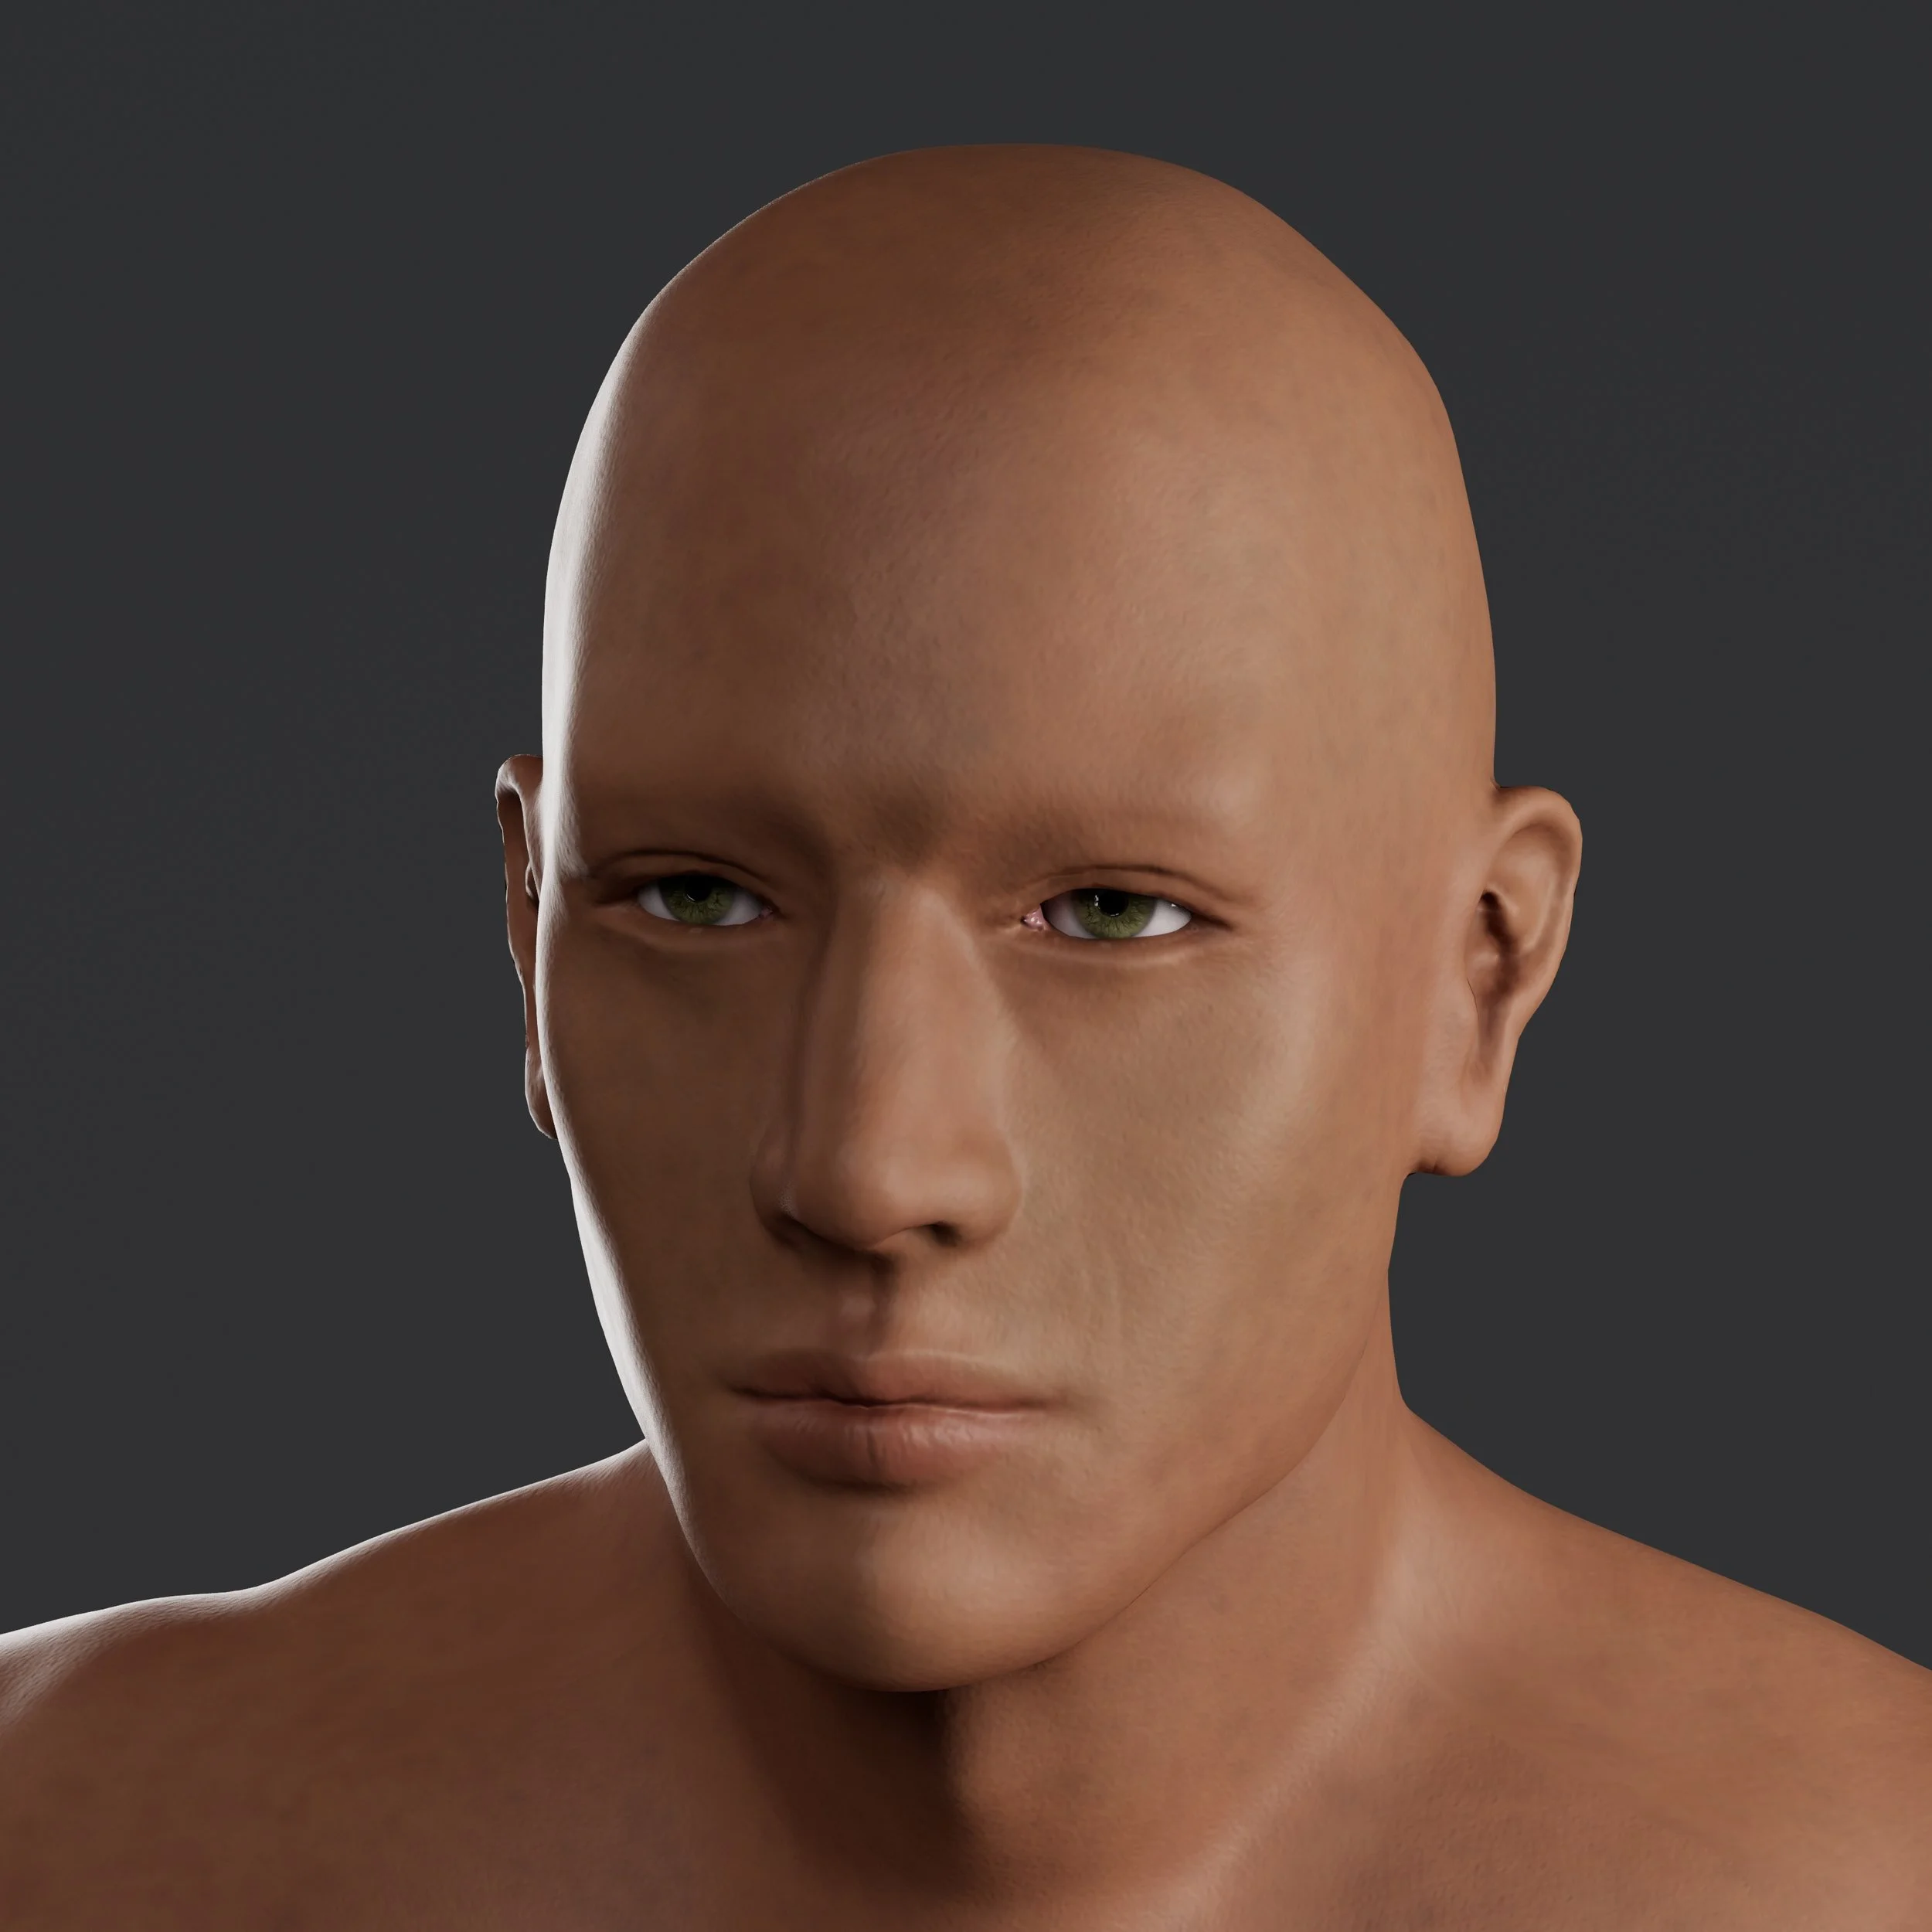
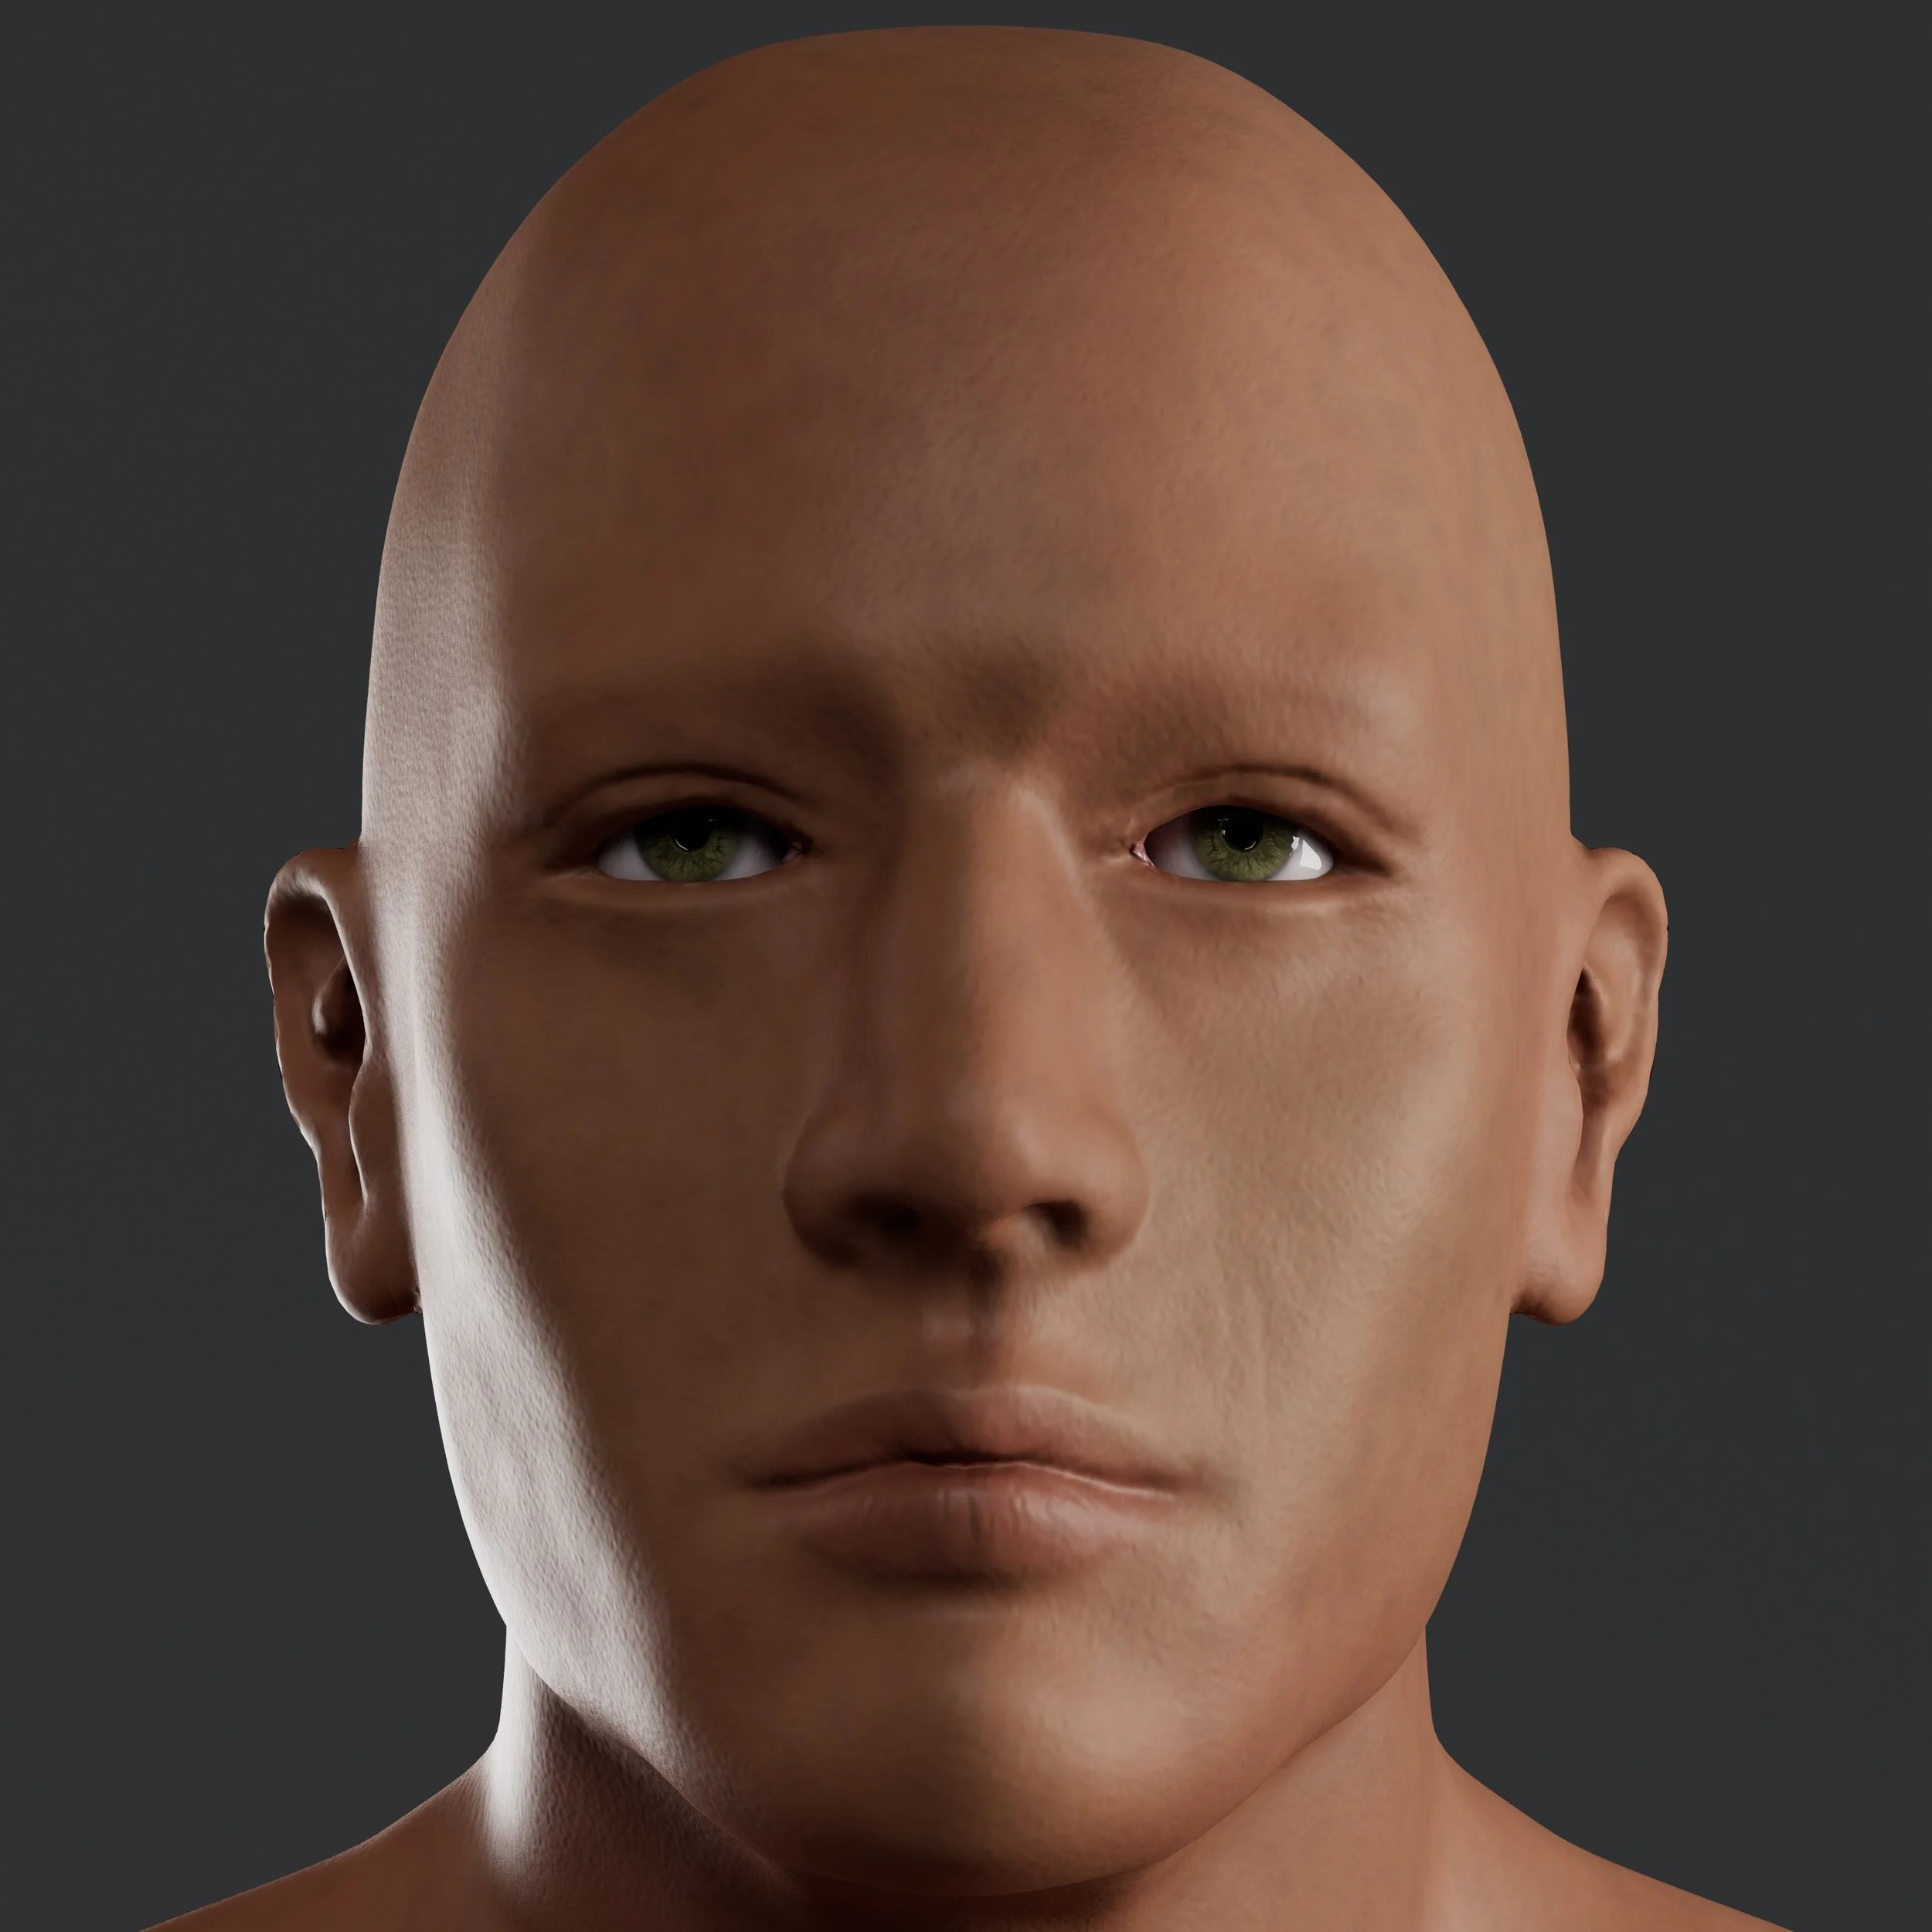
This is my latest hyper-realistic character project (in progress). I started sculpting in ZBrush, adding more skin details using the skin brushes. Then I hopped over to Substance Painter to create different materials and finally rendered it in Maya.
For the hair, eyebrows and lashes, I used XGen instead of hair cards because I wanted to learn to generate hair procedurally and randomize more parameters.
Material creation in Substance Painter
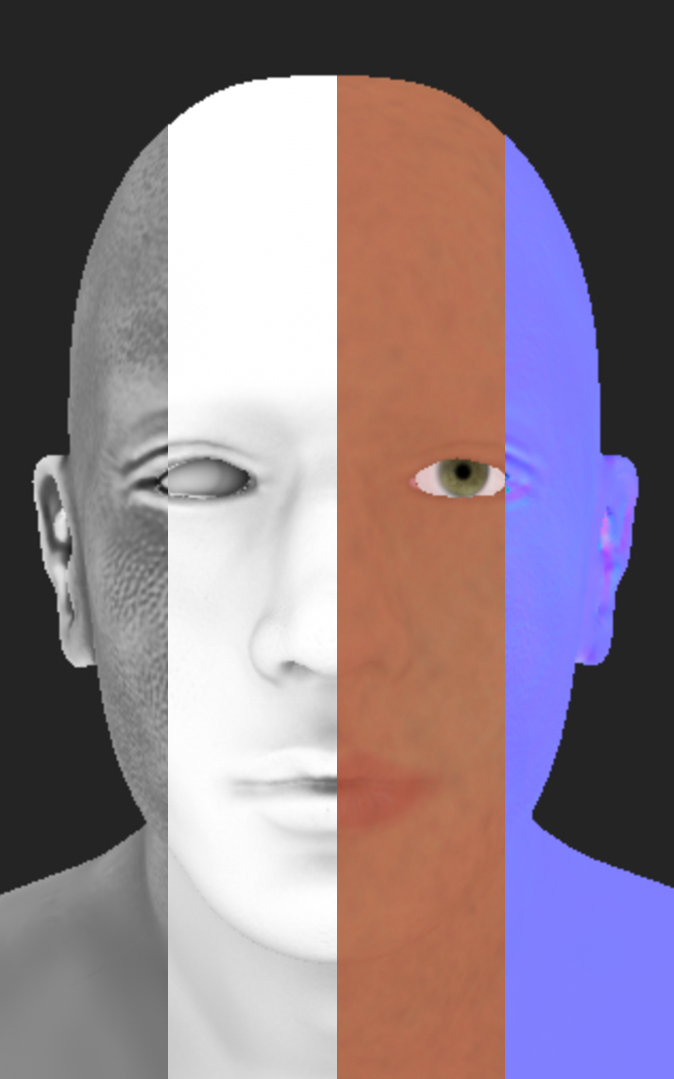

When it comes to texturing, I played a lot with the stencils and stickers this time. I added many paint and fill layers under the black mask to create redness, sun damage, and pores. In order to randomize and create an uneven skin color, I added up multiple layers with various degrees of opacity.
For the iris, I first created the pattern in Photoshop, adjusted the level, and then used it as a stencil to paint over the base color I already made.
In this project, I used the typical workflow where I baked a high poly model to a low poly one. However, I am also exploring another workflow where I sculpt more details through HD Geometry export normal maps directly from ZBrush, and then bake the curvature map based on the normal map. This will be the topic I am exploring next.
XGen Guides

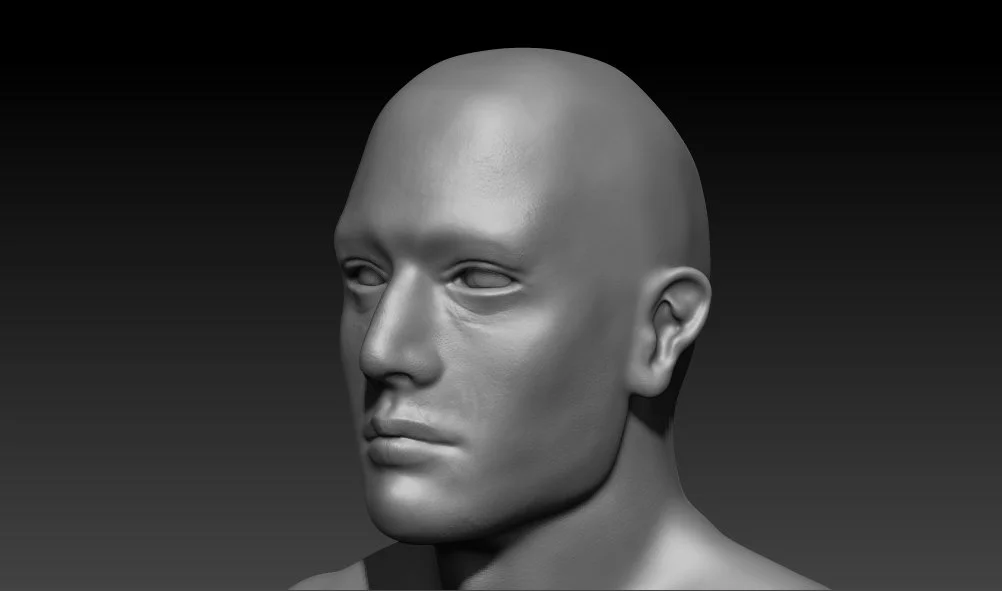
Sculpt rendered in ZBrush (updated version)


Software Used
Maya

ZBrush
Adobe Photoshop

Adobe Substance Painter